Case details screen
This topic provides an overview of the wizard's Case details screen and all the settings and buttons on it.
This screen is part of the wizard.
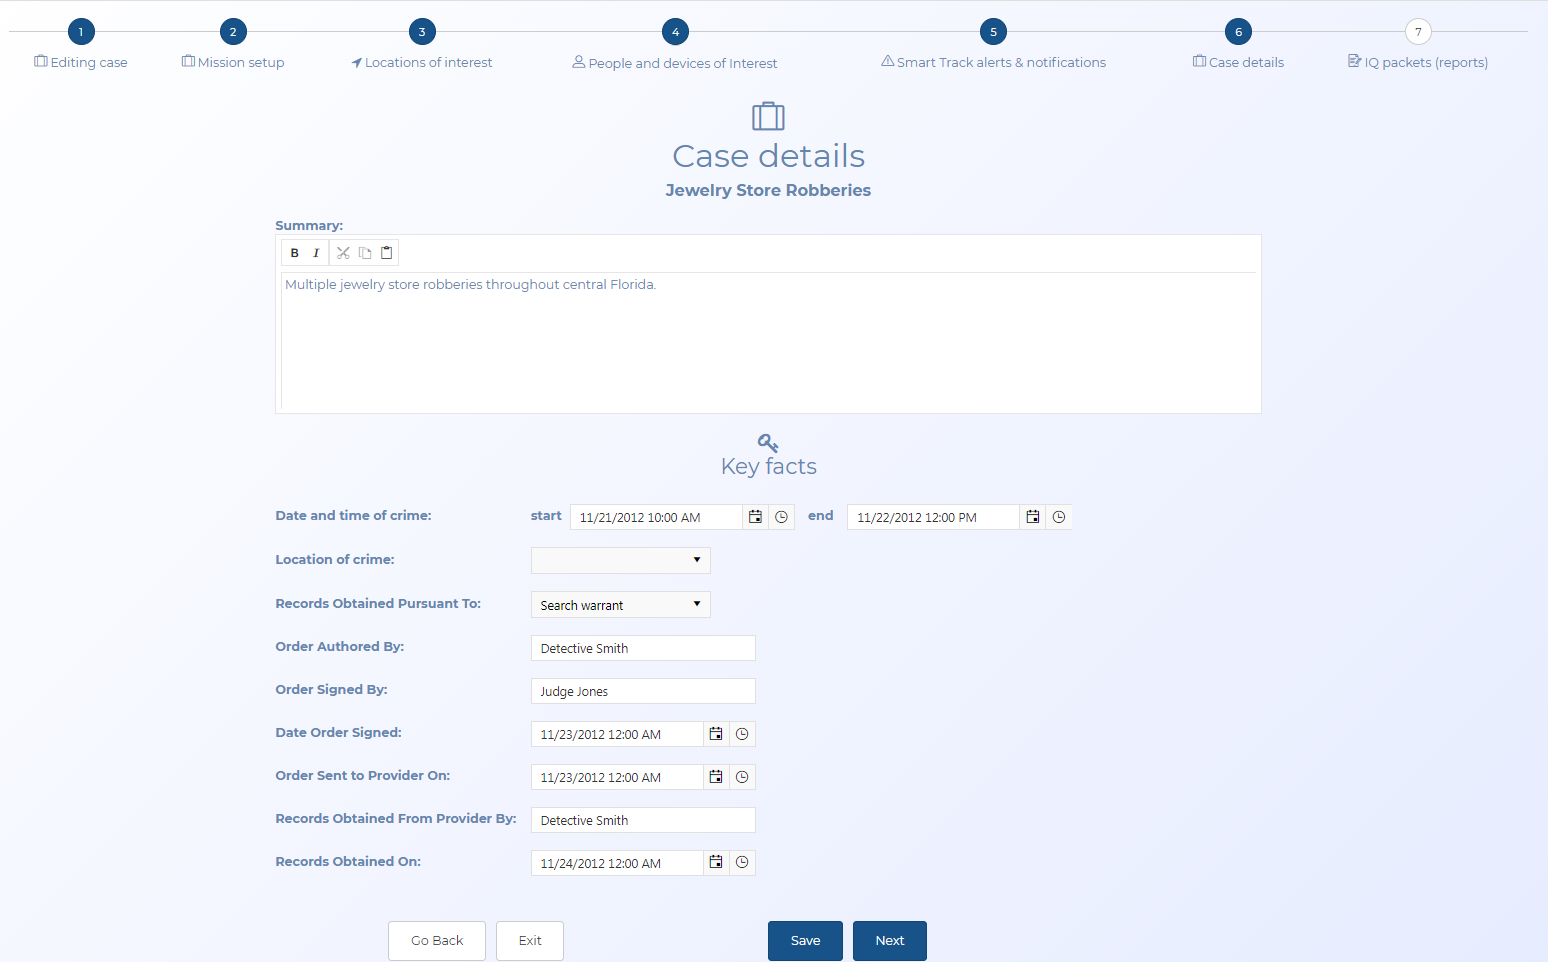
The Case details screen allows you to add a summary and some key details around the event.
If you require information on creating cases using the wizard refer to Creating a case based on historical files using the wizard and mission sets.
Enter a description of the case. This description provides you with an overview of the case on the Manage case screen.
Enter the start and end date/time of the crime. This information is then included in any IQ packet you create.
Select the location of the crime. The options available in this menu are all the locations that you have added to the case. If the crime location has not yet been added to the case you can enter it on the Locations of interest screen (Case management). This information is then included in any IQ packet you create.
Select which legal document was used to request the files, either a search warrant, court order, or subpoena. This information is then included in any IQ packet you create.
Enter the name of the person in your department who wrote the order. This information is then included in any IQ packet you create.
Enter the name of the person who signed the order. This information is then included in any IQ packet you create.
Select which date the order was signed. This information is then included in any IQ packet you create.
Select which date you sent the order to the operator. This information is then included in any IQ packet you create.
Enter the name of the person at the operator who provided the files. This information is then included in any IQ packet you create.
Select which date the files were received from the operator. This information is then included in any IQ packet you create.
Click to go back to the previous screen.
Click to exit the wizard and open the Manage case screen.
Click to go to the next wizard screen.